Design Constraints:
This tent is designed to be transported in a pickup truck with an
eight foot bed. In this variant, the frame of the norse tent is made of unjointed
8 foot supports made possible by the eight foot truck bed. The tent should
have not parts that one or two people can not handle.
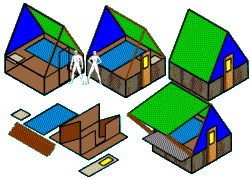
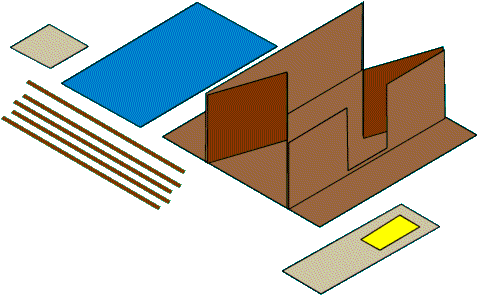
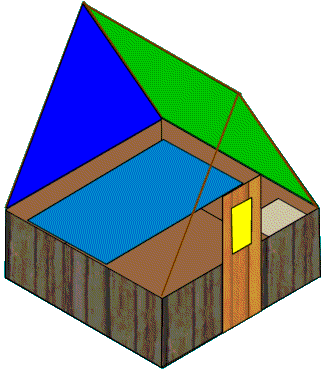
The floor of the tent is 8 ft by 8 ft. Two side walls accordion in
collapsing to a 3 ft x 8 ft bundle without need of fasteners. This gives a
wall height of 3 feet. A floor consisting of two 4 ft x 8 ft sheets that are
hinged together. this floor adds to comfort and strengthens the structure
diagonally. This strengthening helps bolster things with the door cut-out
on one of the 8 foot wall sections.
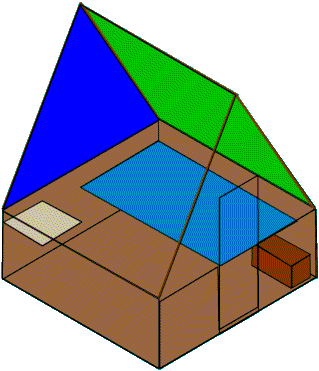
Further strengthening the structure are a sleeping platform supported
by two of the walls and a small corner table.
Form:
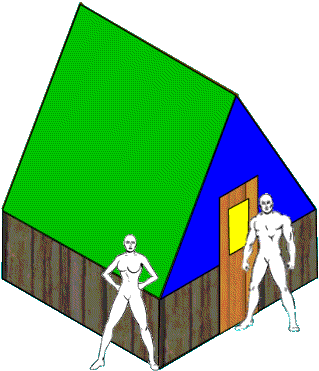
The Norse Tent Frame is fairly standard except they are designed
to fit into notches in the wall . Not shown in the diagram are the carved
woodwork on the frame members and the traditional dragon heads at the crossed
ends. Not shown in the diagram also is a slight modification to make the
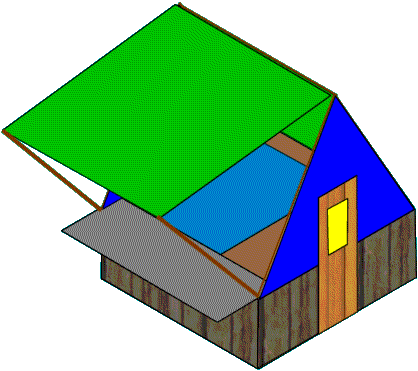
ridge pool slightly longer than the 8 feet of the box frame. With this, the
two arches will tilt outward providing a slight awning effect. The angles
also might increase dynamic strength. Additional poles would allow the roof
panels to be opened to allow light and air flow during the day.
Wall Construction:
With such a design weight would become a factor. Though the design
is untested I would not use solid wood, not even plywood for the box. Rather
I would make them foam cored with a veneer skin on the inside and textured
wood panelling on the outside to give the effect of vertically aligned planks
like in a stave church. This should lighten the walls of the box while retaining
strength. Similar methods have been used in aircraft and such for a long
time.
Variable Set-up for Lighter Transport:
The tent itself would be adaptable to different transportation circumstance.
In the full setup you would need a pickup or trailer to carry it. (possibly
on a roof rack with other vehicles) One could also leave the half walls of
the box frame and floor behind keeping only the standard Norse tent and frame.
Further reduction would allow the same tent skin to be raised on an Anglo-Saxon
frame consisting of two vertical poles and a ridge pool. For further weight
reduction one could forego the ridge pole setting the tent up as a pup-tent,
or even given the right site, hung from a rope tied between two convenient
trees.
Tent Panels:
I have been told that a stronger tent skin can be created by not
using large panels, but by creating the panels out of narrow strips sewn
together. The seams themselves add strength.
Sleeping Platform and Comfort:
The sleeping platform in this plan is 4 foot wide by 7 foot long.
This would be luxurious for the single camper and probably still comfortable
for a close couple. the 7 foot length however does come within 1 foot of
the doorway which is a flaw to my mind. Alternately the bed could be mounted
across the back wall or shortened to perhaps 6 feet.
For people who dislike the creepy-crawly denizens of this planet,
I would suggest actually hanging a mosquito net over the bed and attached
to the edge of the sleeping platform. The sleeping platform as shown would
be a plywood platform. However perhaps a rope support below a mattress or
futon might be nice. I think I might go for an air bed on the platform.
Storage and Ventilation:
The sleeping platform creates sheltered storage space underneath
for tourney chests and armour. (no wet dewy armour!) In this design I have
the sleeping platform at the height of 2 feet. this can be changed giving
more or less headroom above the bed or under for storage. It is possible
to hang clothes rods the length of the tent for hanging garb from. The rods
could be attached from front to back from the diagonal supports. The table
should be sturdy enough to hold a lantern though like many people I would
be hesitant to do so. However this design has the ridge pole at 10 feet above
the floor. I would have adjustable vents in the front and back peaks. With
the variation of the lengthened ridge pole these vents would be fairly well
protected from the weather.
Set-up and Takedown:
For setup, I would consider hinging the arch poles, perhaps even
articulating it with the ridge pole. I would first take the box walls and
straighten the folding walls to create the box. I would then drop in the
floor and unfold it. The sleeping platform and table would come next. Next
I would attach the base of two arch poles to one side of the box frame. The
ridge pole would be positioned and the other poles of the arches would be
laying flat. Next I would drape the tent skin and attach it to the frame.
The two arch poles already attached to the box frame would be hinged. By the
expedient of pushing the ends of the other two arch poles the ridge pole will
lift. These two arch pools would then be placed in their notches in the box
frame and essentially all that would be necessary is to move in. The procedure
would be reversed for takedown.
A two wheeled, four foot wide cart might be a nice option for sites
where you might not be able to drive in. The whole tent an frame could be
loaded on with tourney chests loaded on that. I recommend that the cooler
with the drinks and some munchies be in this load. :-)
Merchanting Option:
With the full set up one side could easily be lifted to act as an
awning. A table for merchanting could be set up straddling the half wall
on that side. Provision could be made to move the table entirely into the
tent to be able to lower the awning with the merchandise within the tent with
the merchant, or in the least safe from prying eyes at night.
Consider the option of two of these tents with a Norse Sunshade between
them. A kitchen could be set up in the one with the awning up and a counter.
This would face the Norse Sunshade which would have a number of tables under
it. On the far side would be the second tent with merchanting table set up
under the awning. It would make for an interesting bistro with merchanting
on the opposite side. Merchant and cook could sleep in the Merchant tent,
staff could sleep under the Norse Sunshade with the awnings lowered for night.
Or not.
|

 Norse Style Tent on a Half Wall